
Why replace a chain?
The chain on a bike is part of the 'drivetrain' that propels your bike. Over time and with use it will begin to wear out. As a chain wears out its performance decreases, as does its reliability.
This deterioration is commonly referred to as 'stretch'. The chain doesn't actually stretch, the pins that join the links together become worn and the chain grows in length. A chain doesn't have to 'stretch' far for performance to be affected, one per cent of 'growth' from the original chain length is considered a 'worn' chain.
Aside from inspecting the chain for wear and measuring it for growth, chain stretch will lead to gears slipping, often referred to as 'chain slip' as well as a decrease in drivetrain performance. The small percent of growth leads to the chain not sitting into the teeth of the cassette and chain rings as intended, slowly wearing away at the teeth and consequently slipping out. Efficiency of the drivetrain is further decreased by the chain not sitting in the cassette and chain ring teeth correctly.
Inspecting your chain regularly and replacing as soon as required will maintain the bikes performance and improve the lifespan of other items such as the cassette and chain rings (which can be costly to replace)
What do you need to replace a chain?
Chain tool: Be aware the tool you will need can differ between brands i.e. Shimano, SRAM and Campagnolo, and also the amount of gears, i.e. 7, 8, 9, 10 or 11 speed. High quality tools are likely to work with most common options.
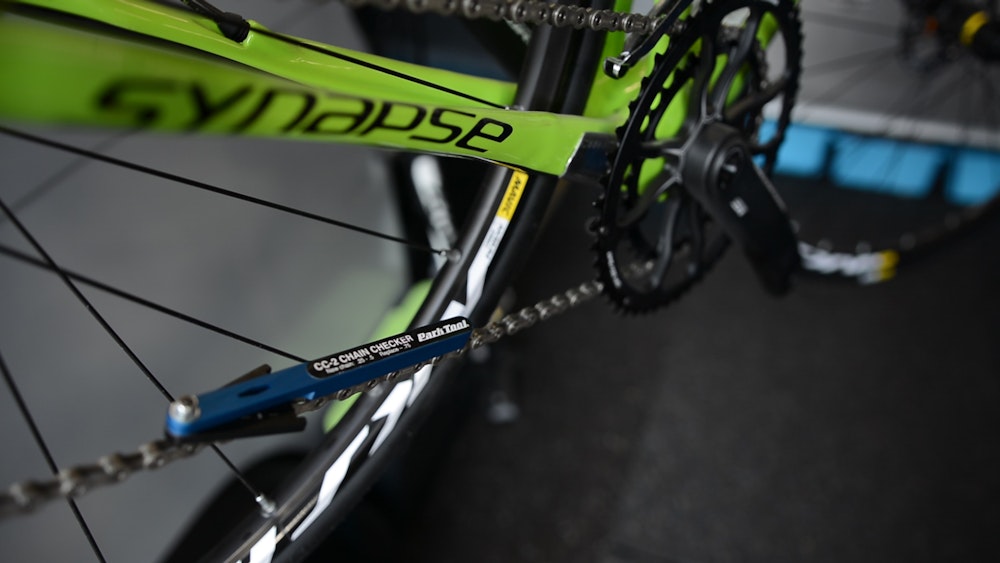
Wear Measuring tool:
New Chain: It's important to match this with the number of speeds your bike has. Best performance is typically achieved by not mixing brands.
[externalhotoffer group="EHO1"]
Checking for 'stretch'
You first need to check the length of the chain to see if it does indeed need to be replaced. There are two common methods, using a specific chain tool or a tape measure.
Tape measure
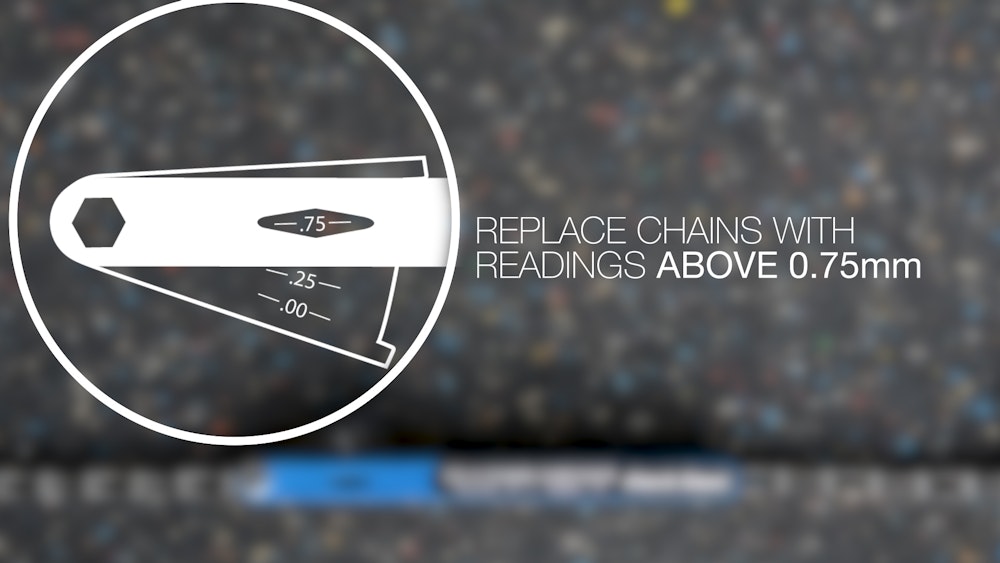
As a reference point, measuring from middle pin to middle pin, a new chain should equal 12 inches for 12 links. A chain that is worn and has grown 1 percent will equal 12 and 1/8 inches. At this point the chain is well worn and in urgent need for replacement.
Using this method is open to user error and hard to be precise. Therefore using a specific chain tool is recommended and also the easiest and most reliable way to check a chains length.
Chain tool
There are many chain tools on the market but they all work a similar way. Most chain tools are designed to be a specific distance and when dropped into the chain will highlight if the chain is worn and needs replacing. It's worth pointing out that most chain tools are designed to be dropped into the chain, not forced. Forcing the chain tool into the chain may result in inaccurate readings and premature chain replacement, not to mention damage to the chain.
How often should I replace my chain?
It's virtually impossible to predict how often a chain needs to be replaced due to the amount of variables at play. The amount of gears, distance covered, riding conditions and bike maintenance all play a part in the wear of a chain and will differ dramatically from person to person.
The best solution is to either get yourself a chain tool and measure frequently or keep up the regular servicing at your local bike shop as they will check this every time. It's worth noting that if you let the chain wear too much, you'll likely need to replace at least the cassette too at the time of changing the chain.
Removing the chain
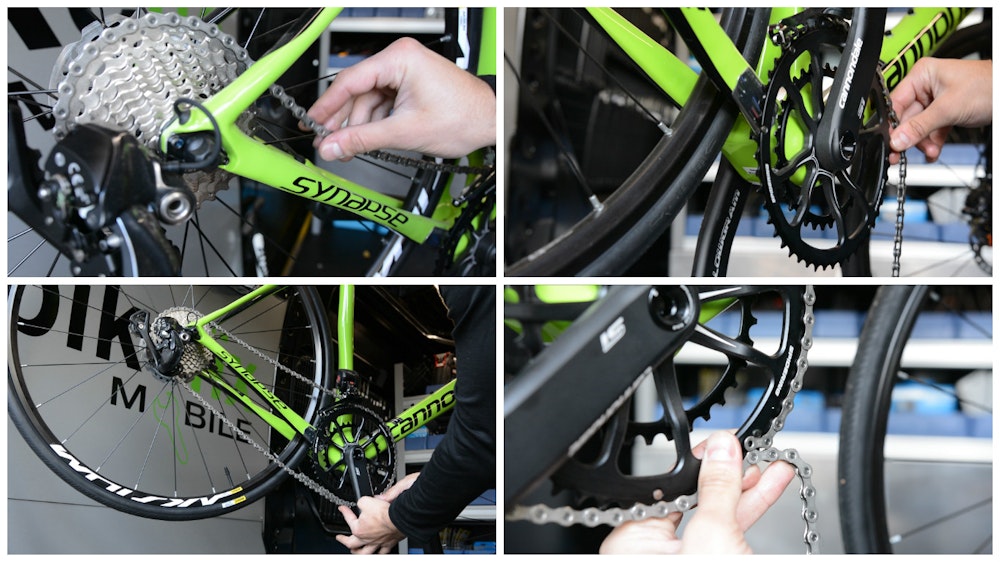
To remove the chain start by putting the chain in the smallest chain ring and smallest cog. This will give you some slack to play with and make removal easier.
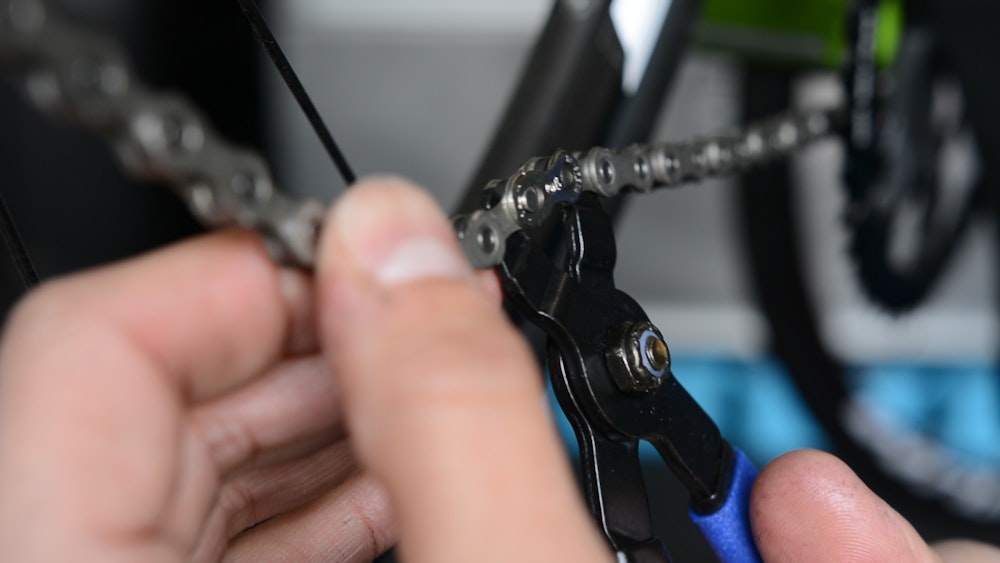
If the chain has a quick link (effectively a deconstructed chain link with two plates and two pins), find the quick link and push the two plates together. For some this can be done by hand, but newer 10 and 11 speed versions will typically call for chain link pliers. Forcing the two pins together while squeezing the plates should release the link and the chain should come undone.
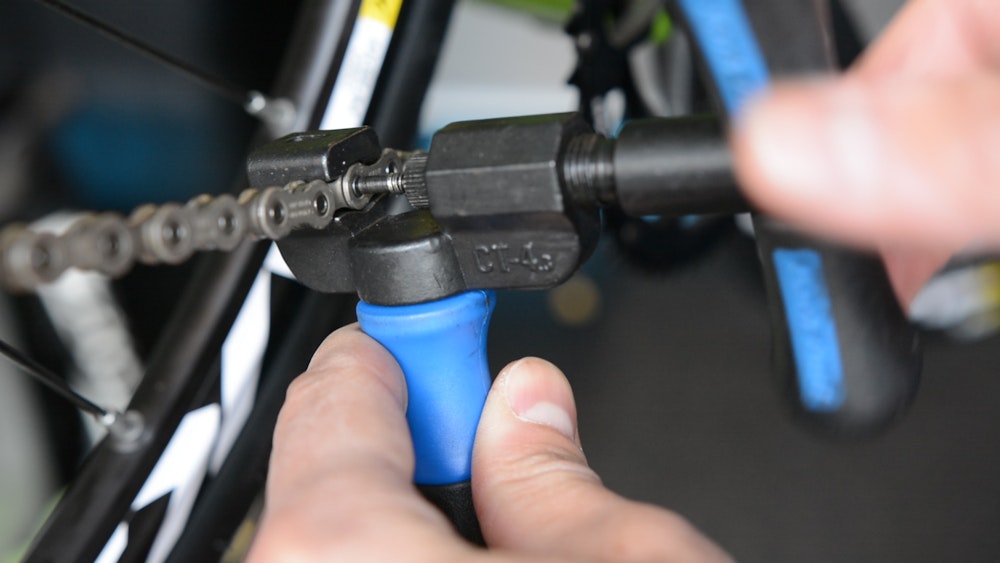
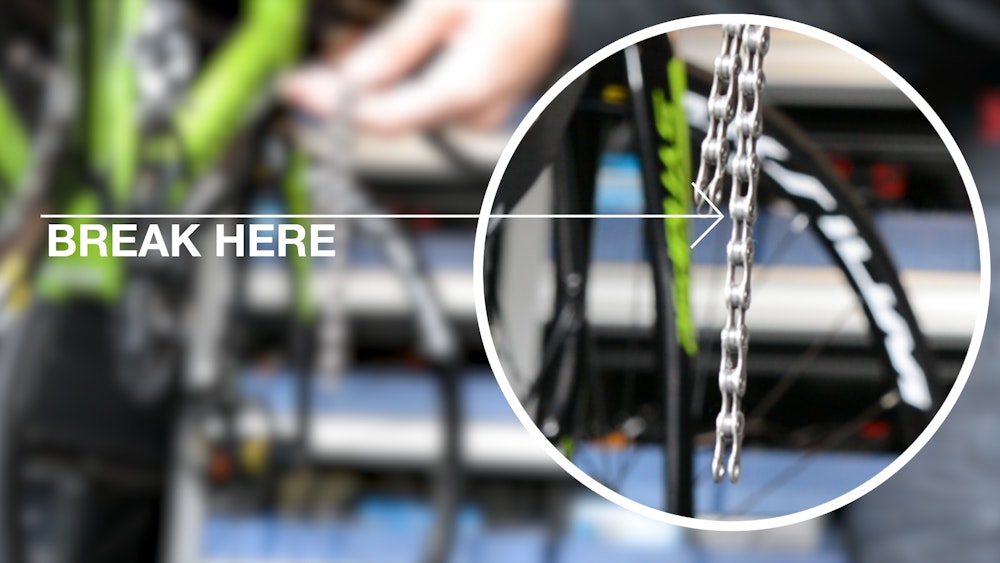
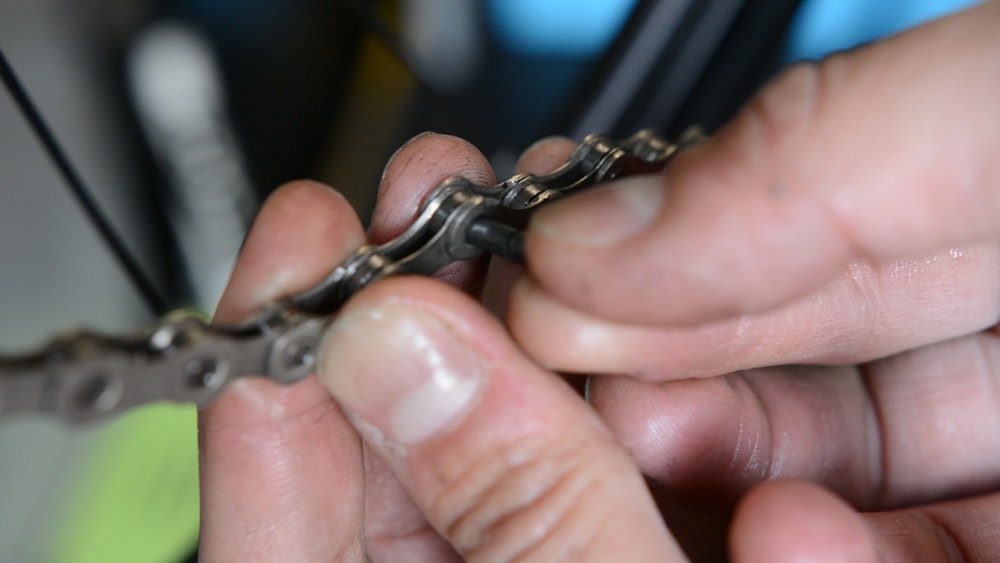
If the chain doesn't have a quick link, a pin will need to be removed. As long as you have the correct tool this is an easy process. Place the chain tool onto any pin and begin to tighten. As you tighten the chain tool onto the pin it will push the pin out, breaking the connection of the chain. Once this is done simply remove the chain from the bike.
Getting the right chain length using the same chain rings and cassette
The easiest way to ensure your new chain is the correct length is measure it against your previous chain, so don't bin your old chain as soon as you take it off. Lay both chains side by side and make a note of how long the new chain needs to be. Then using a chain tool, remove the relevant pin from the chain the same way as you did to remove it from the bike.
Getting the right chain length using different chain rings and cassette
New chain rings and cassette may result in the new chain being a different length to a previous chain. As a result anytime the chain rings and / or cassette is replaced, it's worth going through this simple procedure.
Wrap the chain around the biggest cog on the rear cassette, and the large chain ring on the front. Without putting the chain through the derailleur, pull the chain tight together. Take note of where the two ends of the chain meet, and then add two links (one inch). This will be the length of the new chain. Be sure to size the chain from an appropriate spot (more on this below)
Fitting a new chain
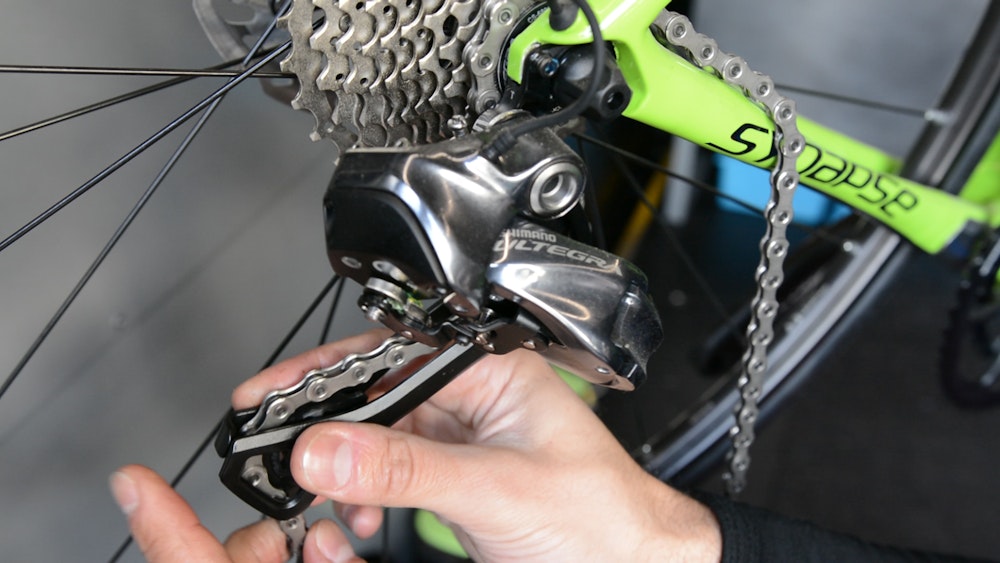
Once you have measured and trimmed your chain to size, it's time to put it back onto the drivetrain. Maneuvering the chain around the rear derailleur is the most challenging part of re-installation. To begin with wrap the chain around the cassette and over the top of the first jockey wheel. Ensure the chain is not rubbing on the outside of the derailleur cage, this is a common mistake. Then guide the chain above the pin below the first jockey wheel and finally around the bottom jockey wheel.
Wrap the other end of the chain around the front chain ring and bring the ends together.
There are two procedures for connecting the chain depending on whether using a quick-link or joining pin.
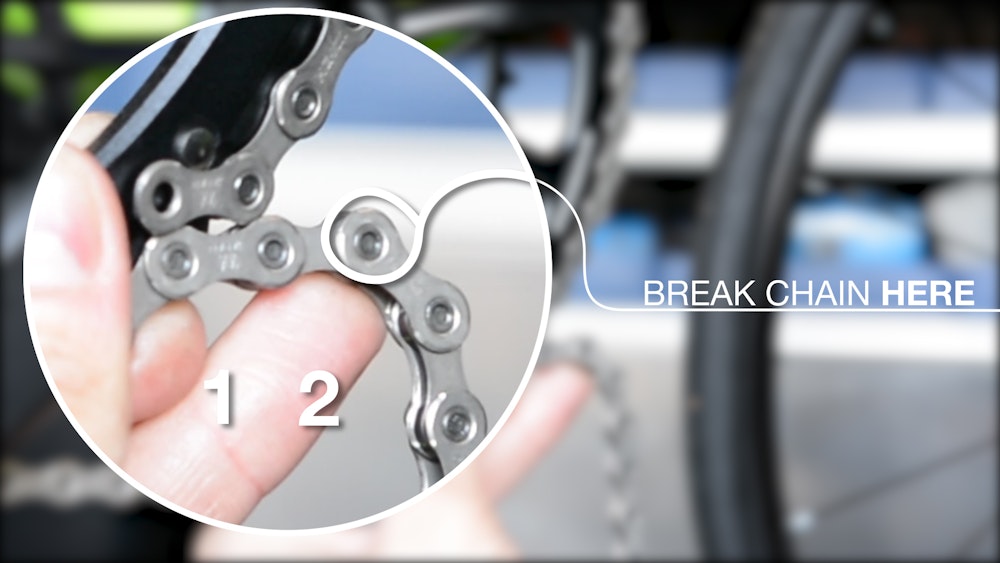
- When using a joining pin, ensure that each chain link at the end of the chain is different so they can be joined together. One end of the chain should be narrow, and the other wide. If you have two ends of the chain the same you won't be able to join them together.
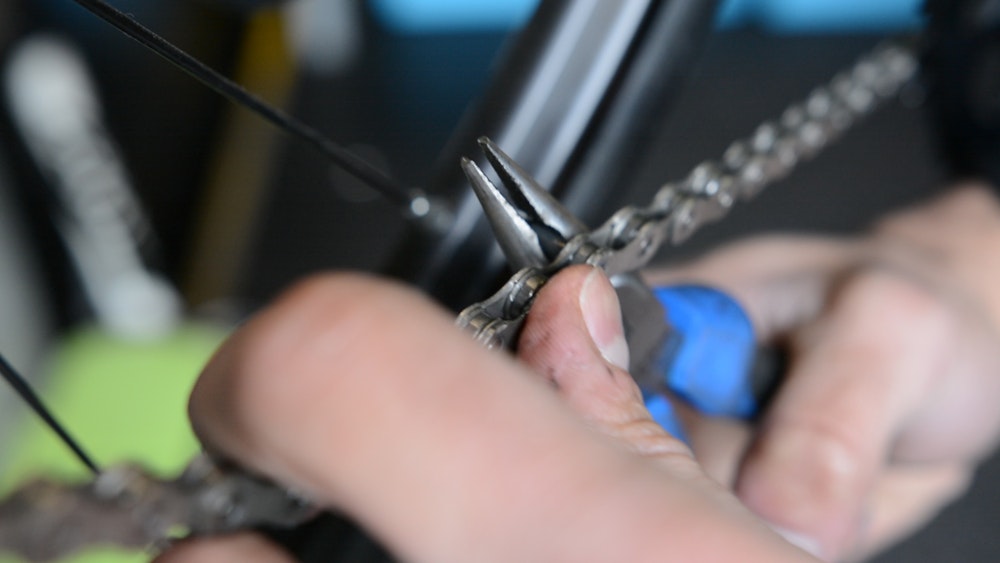
The joining pin will have a narrow end that is used to guide through the hole in the chain link. Tighten the chain tool in the same process as removing the chain, pushing the joining pin into the hole in the chain link. There will be a subtle release of tension when the joining pin is in place and it should appear approximately even on both sides, but go slowly to achieve this. The thin end that was used to guide the joining pin in place should be sticking out of the chain. This can now be snapped off with some pliers, leaving the link in place and the chain ready for action.
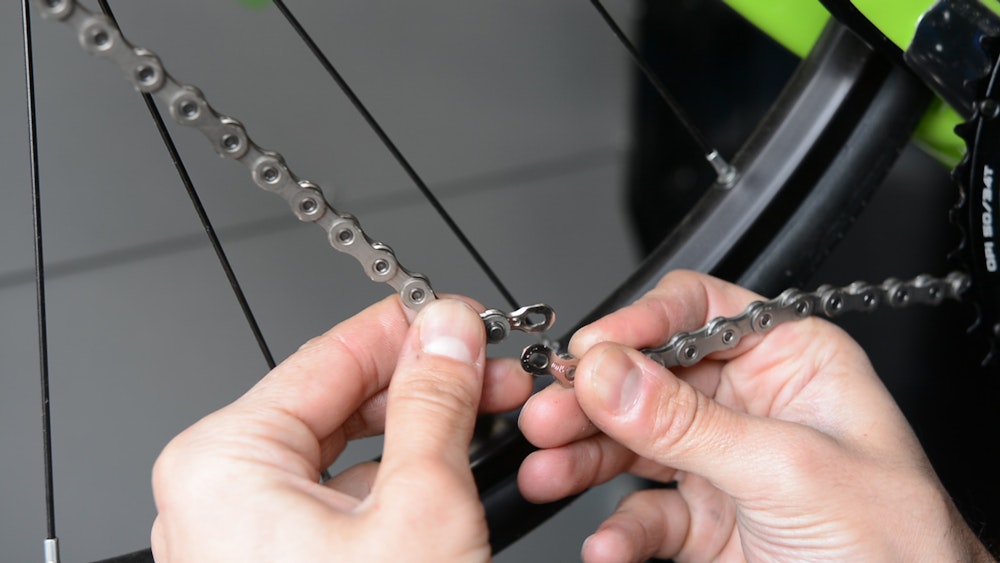
- If you intend on reconnecting the chain with a quick-link, then both ends of the chain need to be narrow. Add the quick link to either end of the chain and pull the ends together. Apply pressure to pull on the chain, and the quick-link should lock into place.
Chain maintenance tips
To prolong the lifespan of your chain here are a few basic maintenance tips
Clean regularly: This should be a no-brainer but regularly cleaning your drivetrain and bike will prolong chain life. This is especially the case following riding in wet, muddy or dirty conditions. Dirt and grit will build up on the drivetrain but also in other areas and eventually make their way onto the drivetrain. When cleaning your bike pay particular attention to the bottom bracket area, seat stays, chain stays and pedals.
Use degreaser: Washing your drivetrain with soap and water is only half the job. Using degreaser is essential to clear the muck that has built up and embedded itself between the chain links and hard to reach places. Before washing you bike, apply degreaser liberally to all areas of the drivetrain and leave to sit for a few minutes before washing off thoroughly. Be careful to not place degreaser directly on areas with bearings (hubs and bottom bracket).
Keep it lubricated: Once the chain is clean and dry it needs to be properly lubricated. Lubricant needs to make it's way into every link in the chain, not just onto a few or randomly sprayed onto the chain. It may take an extra few seconds but apply a drop of lubricant to every chain link and allow to settle before moving on.
Other important pieces of info
If you have a full suspension mountain bike, 'frame growth' from suspension needs to be taken into account. Where possible use your old chain as a reference for length. If not possible, then it's recommended to release the air from the rear shock (or spring) and size the chain with the suspension set to 'bottom out' (the end of its stroke).
Once you have used a joining pin, you should never break the chain on that link in the future.
Make sure you are getting the right chain for your gears. For every extra cog out back, the chain is narrower as a result. Fitting an incorrect chain to your drivetrain will not only compromise performance, it may cause severe shifting issues.
Check out other BikeExchange Workshops 'How-to's' here;
Thanks BikeFix Mobile for the helpful advice and expert mechanic.


