

Have you been bitten by the mountain bike bug? Have an uncontrollable urge to scroll the internet in search of the latest and greatest components for your bike? This list is for you. For the beginner to intermediate mountain biker, this list covers the best value upgrades you can do to get more out of your bike. Whether you’re on a 29er or old-school 26-inch, hardtail or full suspension, these upgrades will raise your riding.
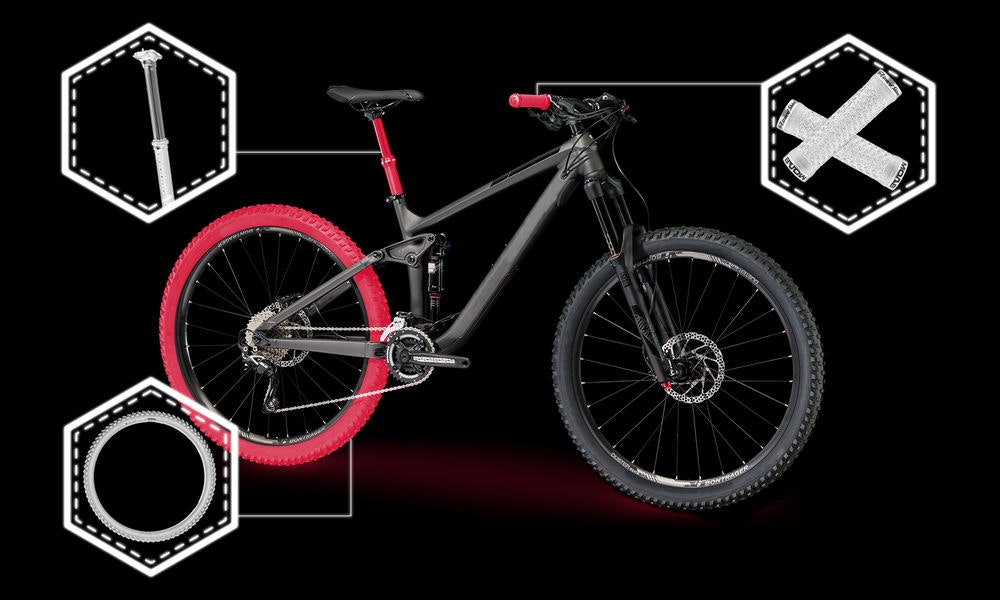
Tires
As the only connection point your bike has to the terrain, tires are undoubtedly the single best area to upgrade when chasing more from your bike. That said, choosing tires can be a minefield of options, and so there are certain things to look for. Deciding what type of riding you do is the first and most critical step.
When shopping tires for your cross country or trail bike, look for a ‘folding’ tire with a kevlar bead. These are far lighter and more supple than non-folding cheaper tires which feature a ‘wire bead’. If you’re running tubeless (more on that below), be sure to look for a tire that’s marked as being compatible – options are plentiful these days.
Different tires will offer different levels of puncture protection, typically the less puncture resistant a tire is, the lighter it is. Depending on where and how you ride, the extra weight may be worth the peace of mind.
Also be familiar of different rubber compounds, most higher end tires are available in a choice of rubber compounds or with multiple compounds in a single tire. Generally speaking, softer rubber compounds offer improved traction but come at the cost of increased rolling resistance and reduced durability. Dual or triple compound tires balance this by putting a faster and more durable compound in the tire center, with progressively softer compounds as you get toward the outer cornering edges of the tire.
Tread pattern is the final decision and makes a huge difference. This will be greatly dependent on what and where you ride, and so it’s something that members of the local mountain bike club or bike shop are likely best equipped to instruct you with what works best on your local terrain.
Tubeless conversion
Going well past ten years since gaining popularity, tubeless tires are now a staple in mountain biking. Without a tube to pinch flat, tubeless tires allow the use of extremely low pressures that award you with increased traction, lower rolling resistance, lower weight, far fewer punctures and a smoother ride.
If your cross country or trail bike doesn’t currently have tubeless tires, it’s a seriously good upgrade to make. Many bike brands now equip their bikes with ‘tubeless-ready’ rims that are just waiting on some sealing tape, tubeless valves, and liquid sealant. The latter being something you should always use in a tubeless setup as it prevents leaks and can automatically fix small punctures without having to stop.
If your bike makes no mention of having tubeless-ready rims, don't worry, there's still hope! Plenty of brands, such as Stan’s No Tubes, Joe's No Flats, Orange Seal and Effetto Mariposa offer tubeless conversion kits to turn standard mountain bike wheels into tubeless-ready ones. From here, some tubeless-compatible tires will let you ditch those tubes.
Grips
If the tires are your bike’s connection to the ground, your grips make up one of the three connections you have with your bike. Giving you a place to grab your handlebars from, grips are an easily overlooked, yet critically important item. Poor grip choice will quickly let to arm fatigue (known as arm pump), blisters, sore neck and shoulders through holding the bars too tight, and just generally an uncomfortable ride.
Mountain bike grips are typically made of either rubber, foam or silicon. They either fit the bars with friction or can be bolted in place (known as ‘lock-ons’). Lock-ons never slip and can easily be removed, but carry a weight penalty and may not absorb vibrations as well as a friction-fit grip due to often having a solid plastic core.
Grip diameter is something to consider and while rather personal, generally speaking, big handed riders should use thicker grips, and small-handed riders should ride thin ones.
If you’re into cross country, one of the most popular grip styles is a silicon foam type. American brand ESI created this market, with many others following suit since. These grips are light, full of traction and absorb vibration. More aggressive riders may wish to look at a soft rubber grip with clamps to lock them to the bars, with brands such as ODI, Lizard Skins, Ergon and RaceFace being popular.
Dropper seatpost
Speak to a number of the world’s best Enduro mountain bikers on what they feel is the biggest innovation in mountain biking of the past decade, and many will answer it’s the dropper seatpost. Allowing quick and convenient height adjustment of your saddle, dropper posts allow riders to tackle technical descents with confidence while climbing back up the hill without compromise in pedaling form or having to stop.
Within reason, most mountain bikes can be fitted with a dropper seatpost. Knowing how much seatpost sticks out of the frame at your full seat height is important to consider, as is the seatpost diameter (diameter is generally marked at the bottom of your seatpost). If your frame uses a common 27.2mm seatpost, then your choices will be limited to just a few options, but those with 30.9 or 31.6mm diameter posts will find plenty of options.
Only newer frames will work with ‘stealth’ or 'internal' dropper seatposts that hide the remote cable inside the frame. All other frames will need to use an external cable or even seat-operated dropper post.
Keep in mind that dropper posts are complicated moving components, much like suspension, and need occasional servicing. For this reason, be careful of the condition if you’re buying a used post.
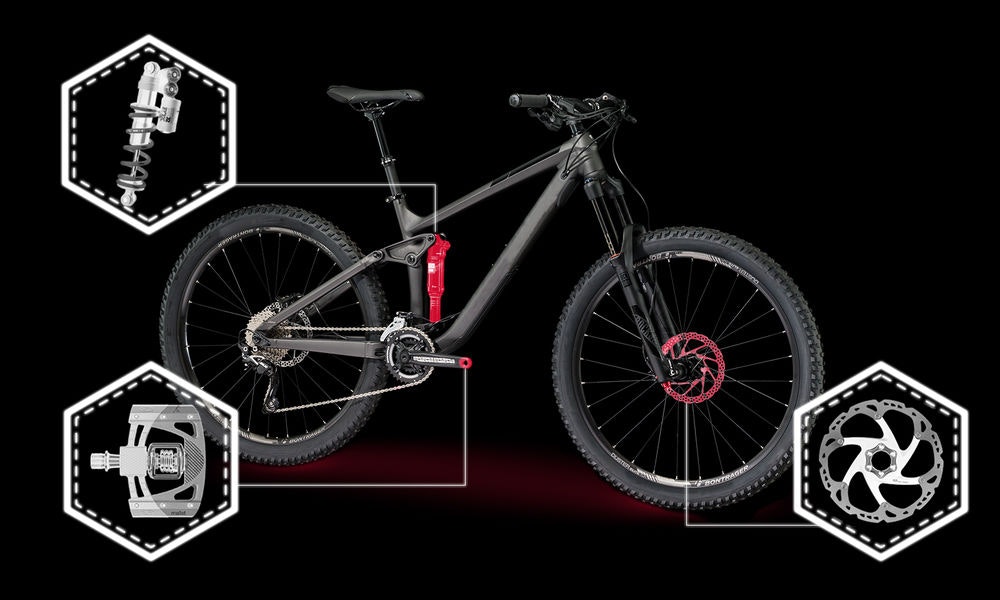
Pedals
Are you still using the flat pedals that came with your bike? Chances are you can do far better. This is because so many bikes come equipped with pedals that let them be test ridden and pass consumer standards, but aren’t designed for long-term use. Upgrading to a quality platform pedal with sealed bearings and replaceable traction pins is sure to be a big upgrade. Such a pedal upgrade is sure to offer improved bike control.
Alternatively, clipping into your pedals with ‘clipless’ pedals is considered the common practice for most riding styles whenever pedaling long distances or at speed. Shimano and Crankbrothers are the two market leaders in this space, and you’ll need to factor in the cost of mountain bike shoes too. Generally speaking, the more you spend on clipless pedals, the lighter they are, the better they clear mud and the more durable they’ll be. Corrosion resistance is something few think about, but we can assure you more expensive pedals will ward off rust better.
Brake pads and Rotor
Assuming your mountain bike has disc brakes, there may be space to get an upgrade in performance at a low cost. This especially applies if you’re using budget Shimano disc brakes. Take a closer look at your disc rotors (the round silver things attached to your wheels) and you may see ‘Resin Pads Only’ stamped into the steel. If this is you, then upgrading your rotors to something higher end will also allow you to use a sintered metal brake pad that offers improved braking power and durability.
If your brakes aren’t Shimano, then not all hope is lost. Mechanical disc brakes (aka - cable operated) can get a significant boost in performance by moving to a compressionless brake housing. Doing this will reward you with a stiffer feel at the brake lever, and in turn, improved brake control, power, and reduced hand fatigue.
For those with hydraulic brakes, a professional bleed, and some new high-quality brake pads can quickly breed new life into a tired system. We’re fans of sticking to ‘original’ brand brake pads to match your brake, but we’ve also had good luck with premium options from the likes of SwissStop and Koolstop. Generally speaking, avoid the cheap, generic brand brake pads.
Suspension Service and Tune
Your suspension is one of the most complicated components on your bike, and with every pedal stroke, every bump, and every deviation - it’s moving. After the frame, your suspension is the most expensive component/s and requires regular servicing to keep it working as it should and from wearing out beyond repair.
It's possible to turn a suspension service into an upgrade. Service specialists can ‘tune’ your suspension to help reduce stiction, improve damper performance and generally make your shocks work better for your weight and bike. This is because many forks and rear shocks were factory set for an ‘average’ rider in mind, and so if you’re either aggressive or smooth, heavy or light, chances are things can be better.
Your local bike store can give you access to these suspension specialists. If you’re comfortable in removing your suspension from the bike yourself, then many of these places will deal direct. A service or tune isn't cheap, but it's far more cost effective than the cost of a replacement fork or shock.
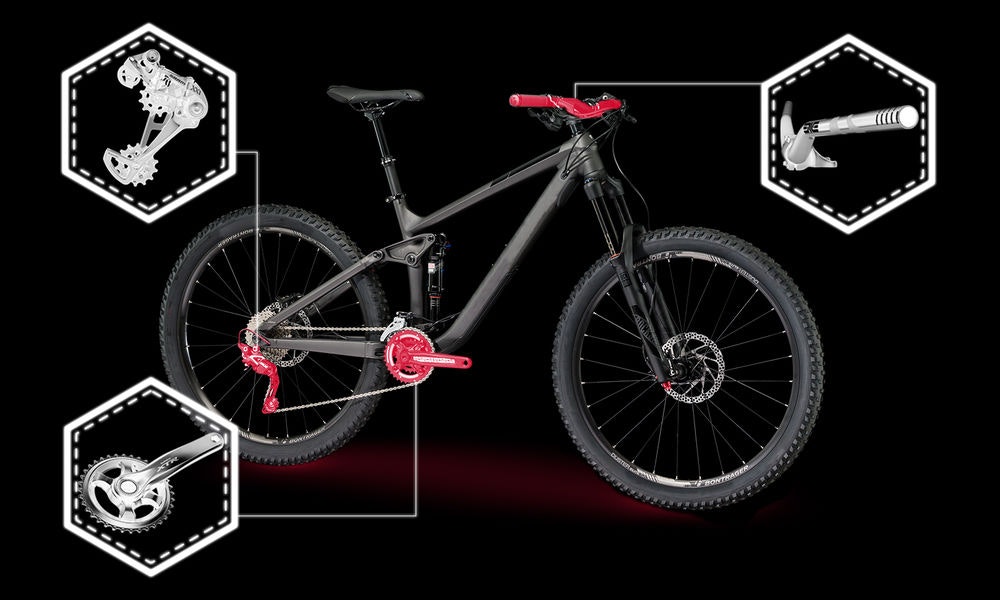
Wider handlebar and shorter stem
Look to any 2017 performance mountain bike and you’ll likely see wide handlebars and short stems in use. Even cross country race bikes are now coming fitted with 720mm+ wide bar and a stem less than 80mm in length. This is because a wider bar gives you greater stability and control over the bike, while a shorter stem helps to quicken your bike’s handling and keep your weight better balanced between the two wheels.
It’s possible to swap one without the other, but handlebar width and stem length are closely related. Imagine a wider bar in your hands, your shoulders likely move you forward in order to stretch your hands wider. For this reason, moving to a slightly shorter stem will help keep your body position effectively the same. Likewise, for moving to a shorter stem, it's sure to create a twitchy ride if keeping your current narrow handlebars (anything less than 700mm).
There are endless options for stems and handlebar, but much of it will be dependent on budget. Unless you’re willing to spend big money on a carbon fibre handlebar, look for aluminium items. The bigger brands, such as RaceFace, Easton, PRO, Thomson, Renthal, Truvativ and Ritchey are safe bets in this space.
Clutch rear derailleur
Bang, bang, bang! Are you scaring away wildlife as your chain knocks against your frame when riding through rough terrain? If so, it’s likely your rear derailleur is missing the newer ‘clutch’ technology. Older derailleur designs relied purely on spring tension to keep control of the chain; whereas new clutch-equipped derailleur hold the lower derailleur cage firm with one-directional friction. Your shift lever will be slightly harder to push, but the benefits certainly overcome this.
Both SRAM and Shimano offer clutch-equipped derailleurs, and as long you’re running nine-speed or higher, your drivetrain can be upgraded to be quieter and with less chance of a dropped chain. Which also leads us onto the final upgrade idea.
1x gear conversion
Mountain bike gearing is only heading in one direction, and that’s with one chainring on the front. Look at the bikes of the world’s best mountain bikers and you’re unlikely to find a front derailleur or front shifter in use. Single ring, or ‘1x’, shifting reduces complexity, saves weight, eases confusion over gear selection and lessens the chance of a mechanical. To overcome the loss of front gears, the rear gears should span a far wider range through the use of a larger cassette.
Changing out your whole drivetrain to a new 1x system is an option, but cheaper upgrade options exist too. Having a clutch-equipped rear derailleur is the first step as this will ensure your chain doesn’t jump off the front chainring. The next step is swapping your front chainrings for a ‘Narrow-Wide’ chainring, these feature an alternating tooth pattern that leads to better chain retention, again, to stop the chain from jumping off. Most decent crankarms can work with such a chainring, although you may need shorter chainring bolts.
Once you’ve done this, you then want to get yourself a new chain and a cassette with the right number of gears. If you’re using 11-speed, your options are plentiful from both Shimano and SRAM. If you’re using 10-speed, you’ll likely want to look into complete cassettes from either SunRace (budget) or Praxis Cycles (premium). Other brands, such as OneUp and WolfTooth, offer special expander cogs that can be added to existing Shimano cassettes.
If you’re using 9-speed or lower, then options do exist, but you’ll likely get the best experience by upgrading to a newer 11-speed system, such as Shimano SLX.
Think we missed something? Let us know in the comments section below.
Follow BikeExchange: Email | Facebook | Twitter | Instagram | YouTube | STRAVA


